An easy layered blondie dessert bar. Banana blondies with lotus biscoff biscuit base and dulce de leche topping. This banoffee blondie recipe is borne out of a love of Biscoff, a spare banana and a desire for a sweet treat.
Banoffee
I didn't grow up with banoffee, but it is a common and much-loved British dessert, usually in pie form. I've had arguments with my husband about the origins of banoffee as a flavour - he (and many Brits) seem to think it is from America. I of course had to research this topic in an attempt to prove him wrong. Apparently the origins and inspiration for the banoffee pie are a bit patchy, but it originated sometime in the 1970s. There is reason to believe it may derive part of its method from an American recipe called Blum's Coffee Toffee Pie, which involved boiled condensed milk as a 'toffee' filling. The banana element, however, and the banoffee pie as it exists today seems to be definitely English.
As the name may suggest, banoffee is a combination of banana and toffee. It is generally in a pie form with a healthy amount of cream. The popularity of the combination, however, has seen banoffee expand into all sorts of products, like candies, fudge, spreads and drinks. You can even find banoffee scented candles.
Banoffee Blondie Bar Ingredients
My recipe for banoffee blondie bars are super easy to throw together, relying mainly on cupboard staples. The main things you will need are:
Biscuit Base
- Butter - I will always rely on unsalted butter as salt can be added separately if necessary to the recipe. Adding salt separately can be useful for taste but also beneficial if you are needing to follow a low sodium or other diet.
- Crushed biscuits - the British use the word biscuit for cookie. In my experience of translating between American and British English, a biscuit in Britain is a fairly dry cookie, so we're not talking about a thick and gooey chocolate chip cookie style cookie here. In essence, the base in this recipe needs to be something akin to a graham cracker crust. I personally believe that a Lotus Biscoff biscuit base will be the best option. If you don't have these available, you could use any other crushed biscuit here (digestive, graham cracker, even Oreo) if you prefer.
Banoffee Blondie
- Sugar - I've opted to use a combination of both white and brown sugar here. The inclusion of some brown sugar will enhance the flavour, adding a molasses-y vibe.
- Flour - either all purpose flour or plain flour will work in this recipe.
- Cornstarch - or cornflour in the UK.
- Baking powder
- Salt
- Egg
- Vanilla extract - a key ingredient in baking. Vanilla is a fabulous flavour in its own right but is an excellent flavour enhancer as well. Adding it to this recipe will help to build and develop the flavours of other key ingredients including the banana.
- Banana - you'll want one that is ripe and easily mashed up with a fork.
- White chocolate - either in chip form or chopped up to small/medium chunks.
Toppings
- Dulce de leche caramel topping - this can be made from scratch or store bought. I used the sweetened condensed milk method from Epicurious. While it took a few hours, it was massively hands off and easy!
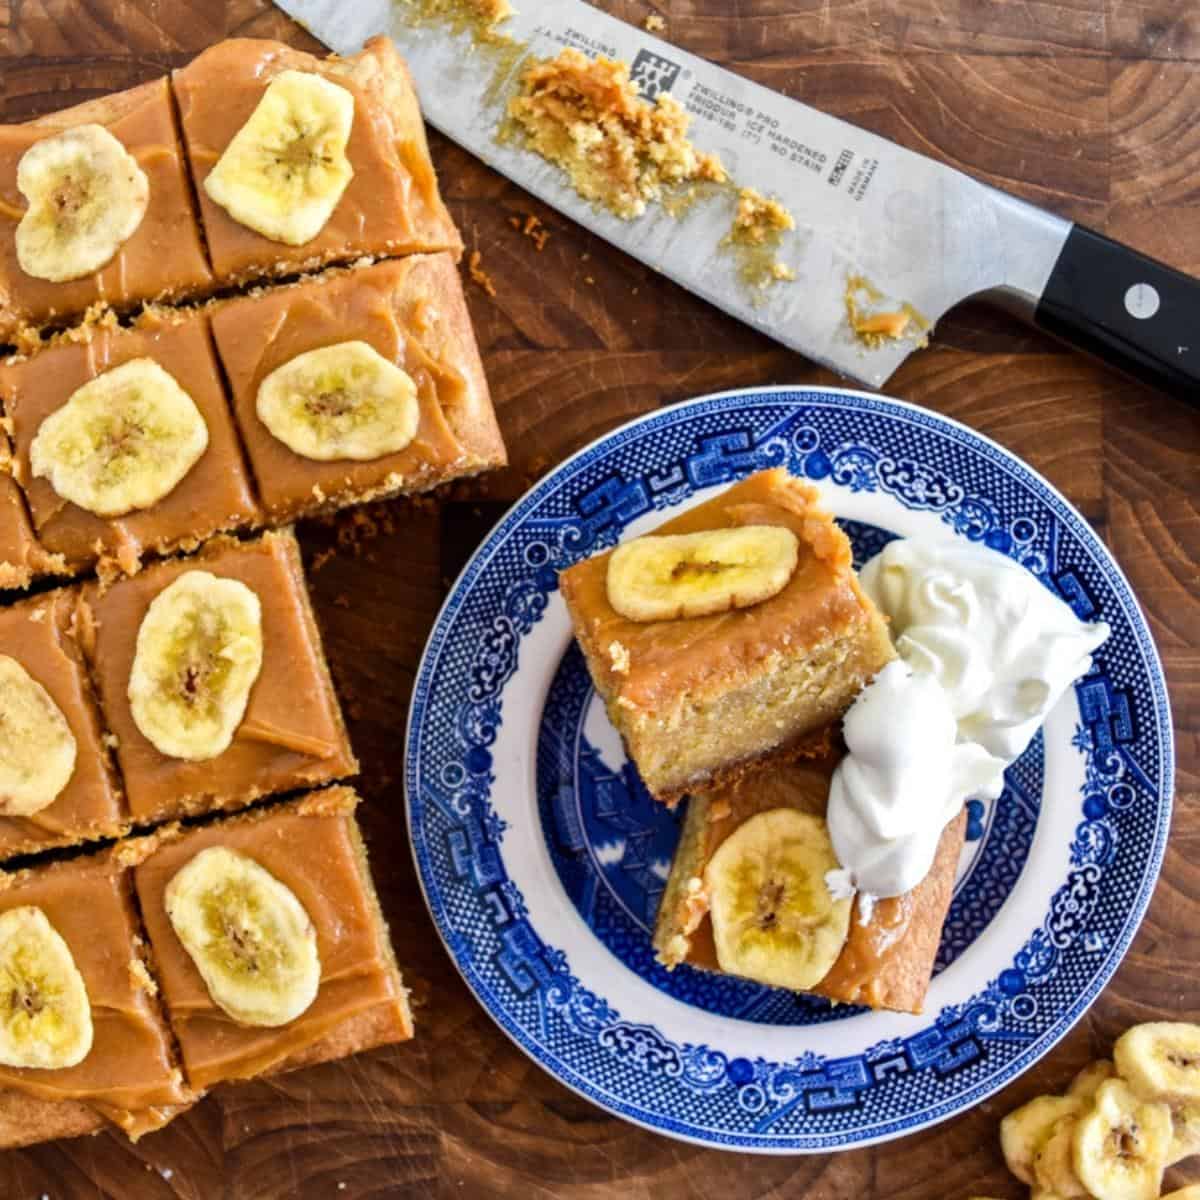
- Banana Chips (optional) - I opted to decorate mine with banana chips. These were useful for providing a visual reminder of the banana included in the recipe, whilst also adding some flavour and texture to the finished product.
Making Banoffee Blondie Bars
Don't let the layers dissuade you from giving these a try - its actually a super simple recipe.
Line the pan
For ease of removing from the pan in the end, it is worth lining your base with parchment paper. This will help you lift the bars from the pan, rather than try to flip or dislodge these in another way. I would normally say to cut two strips 9" wide by about 15" long. You can then layer one on top of the other cross wise so that they fit in the pan, but overhang the sides.
Make the base
Once your pan is lined, pre-heat your oven to 350 F (175C/160C Fan). In a bowl mix together your crushed biscuits and melted butter. You are looking for a moist crumb consistency, essentially the same as a cheesecake base. Add these crumbs to your prepared pan and press firmly to pack evenly into the base and corners. I like to use the back of a spoon or my fingers to do this. Once evenly pressed down into your base, set this aside.
The Banoffee Blondie layer
For the blondie mix, add your dry ingredients (flour, cornstarch, baking powder, salt) to a small bowl and give these a stir together. In a large bowl, beat together your butter and sugars until well combined and light. Add your vanilla and egg, beating until well incorporated. Then slowly add your flour mixture, folding together with a spatula. Make sure to mix this until all the flour is incorporated, but avoid overmixing. Next add your mashed banana and white chocolate, folding together to evenly distribute in the batter. Pour this on top of your base, smooth it out to cover the pan evenly and bake in the pre-heated oven for about 45 minutes.
Time to Bake!
Depending on your oven, you may want to start checking after about 30 minutes and rotate the pan to make sure it is cooking evenly. Check the baking by inserting a toothpick into the middle of the blondie. If this comes out mostly clean, you are good to go! Remove from the oven and allow to cool in the pan.
Toppings
Once cool, top with the dulce de leche, spreading in a layer across the top. I like to add a banana chip to each blondie - so 12 to 16 in total depending on how you want to slice your bars. This is mostly decorative, but also will be complementary to the banana flavour in the blondie and provides a nice additional texture in the dessert slice.
I would suggest using the parchment paper to lift the blondie bars from the tin prior to slicing, since this will give you more room to cut. It will be easier to then take the slices as well, without losing bits of the biscuit base to scooping out of the pan.

Serve on its own or alongside some whipped cream - to get the full banoffee inspired experience!
FAQs
These banana blondies with caramel top are a great make ahead treat and will keep well for about 4 days at room temperature. For best results store in an airtight container.
Yes! These easy banoffee bars can be frozen. Allow them to cool completely at room temperature first. In order to freeze most efficiently, slice the bars first. Then place in a single layer on a lined tray and freeze until firm. Then transfer to a ziploc bag or other freezer safe container. Once they are frozen solid, they can be stacked to save space.
Allow to defrost at room temperature in a single layer (don't leave stacked when defrosting or they may stick together!).
Looking for fun dessert bars? Try some of these:
- Chocolate Marshmallow Brownies
- No Bake Nanaimo Bars
- Cadbury Creme Egg Blondies
- Paradise Pie Blondies
- Brookies

Banoffee Blondie Bar
Equipment
- 8" square baking tray
Ingredients
Biscoff Base
- ¼ cup unsalted butter melted
- 1¼ cup crushed biscuits such as Lotus Biscoff or graham crackers
Banana Blondie
- ⅔ cup unsalted butter melted
- ½ cup light brown muscovado sugar firmly packed
- ½ cup superfine granulated sugar or caster sugar
- 1 egg
- 1 teaspoon vanilla extract
- 1½ cup all purpose flour or plain flour
- ½ tablespoon cornstarch or cornflour in the UK
- ¼ teaspoon baking powder
- ¾ teaspoon salt
- 1 medium ripe banana mashed with a fork
- ½ cup white chocolate chopped into chunks
Topping
- 1 can dulce de leche or caramel topping
- 16 banana chips
Instructions
- Preheat the oven to 350°F (175C/160C Fan) and line a 8" square baking pan with parchment paper.
- In a medium bowl, mix together the ingredients for the base (melted butter and crushed biscuits). Once combined, sprinkle into the prepared baking tin and press firmly with knuckles or the back of a spoon, until evenly and well packed.
- In a small bowl, stir together your flour, cornstarch, baking powder and salt. Set aside.
- In a large bowl, beat together your ⅔ cup butter and sugars until light and fluffy. Add your egg and vanilla, beating to combine.
- Add your flour mixture in two or three additions, stirring well after each. Then add your mashed banana and chopped chocolate, fold to incorporate.
- Pour the batter into your prepared tin and bake for about 45 minutes, checking until a toothpick inserted in the centre comes out mostly clean. Once baked, remove from the oven and allow to cool in the tin for about 20 minutes.
- Pour one can (about 1 cup or so) of dulce de leche onto the top and spread over. Place a banana chip in the centre of each expected slice - I like to cut mine into 16 even pieces, but you could do 12 if you prefer more generous portions. Using the lining to help you remove the blondie bars from the pan, pull these out before cutting as this will make the slicing in the grid easier.


Kelly Turner
Please could I have the measurements in grams if possible?
Liz Mincin
Hi Kelly - thanks so much for your message! I hadn't realized the gram conversion wasn't active on this recipe card. I've switched this on now, so you should be able to toggle across to metric. Hope this works for you!!