Incredibly easy two ingredient golden Oreo crust! This is the perfect recipe for making a vanilla cookie base for cheesecakes or pies and can be used with baked or no bake desserts.

Ingredients
Just two simple ingredients for this recipe:
- Golden Oreos - the vanilla sandwich cookie cousin of the classic Oreo.
- Butter - unsalted butter works best, but you can also use salted in this recipe. Be aware that salted butter will lead to a slightly salty taste to the finished product. The butter should be melted either in the microwave or in a small saucepan.
Making Golden Oreo Pie Crust
This quick base is essentially a light golden vanilla version of my basic two ingredient Oreo Crust.
First you need to crush the Oreos into a fine crumb. You do not need to remove the filling. Simply add the golden Oreos to a food processor and pulse until the cookies are well ground.
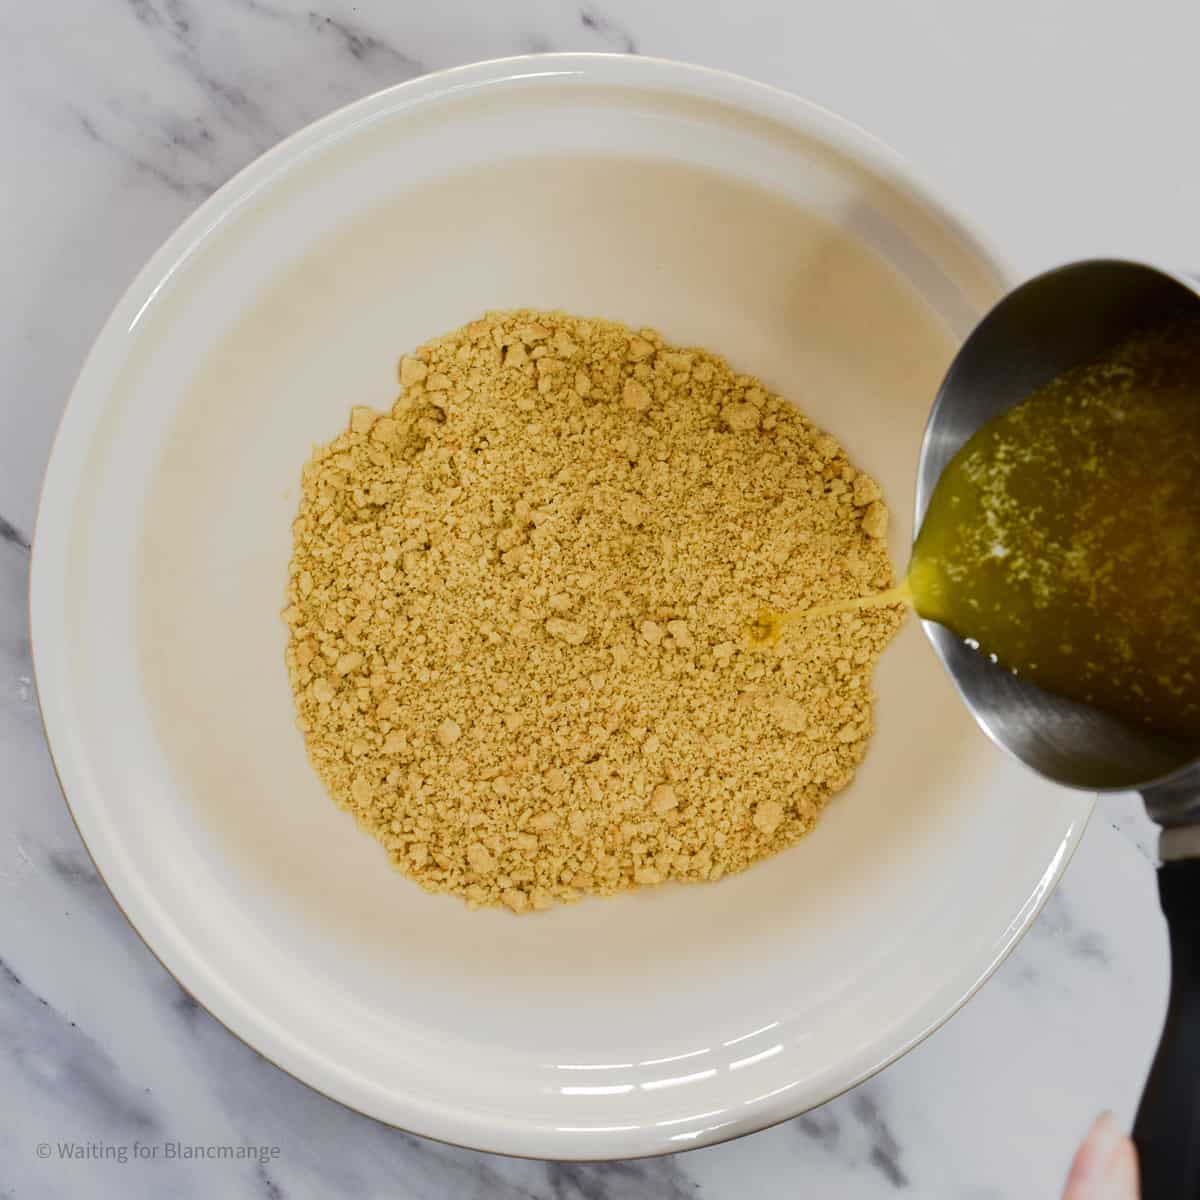
Pour these crumbs into a bowl and then add the melted butter. Stir this together into a moist crumbly mixture.

Note on Making Golden Oreo Crumbs Without Food Processor
If you do not have a food processor (which I don't at the moment!), you can also do this by hand, by putting the Oreos in a sealed plastic bag and smashing with a rolling pin. This will take more time and effort than the food processor, but will produce crumbs that are fine enough for the golden Oreo cookie crust.
First break whack the bag repeatedly to break the Oreos into smaller pieces. Once you have a rough crumb, you can press and roll the rolling pin over the bag. The pressure will grind the remaining bits into a finer crumb.

Pressing the Crust
Much like any cookie crumb crust, you will need to press this crumbly mixture firmly into the base of your pie, tart or springform cake pan.
If you're using a pie or tart shell, you do not need to grease this or line it in any way. The golden Oreo crust has enough butter in it that it should not stick to your plate when removing slices.
If you are using a springform cake tin for a cheesecake (in particular no bake cheesecakes), this should be lined with parchment paper before adding your crust. This will make it a lot easier to handle and remove when ready to serve.
For pressing, I recommend using a measuring cup or other kitchen utensil with a flat bottom. This will make it easier to press a more even base layer than just using your fingers. You can then use the utensil or your hands to press the edges and sides.
Once your vanilla Oreo cookie crust is formed, I suggest chilling this until ready for use. Whether you are making a baked or no bake filling, it is useful to chill the crust while the filling is being prepared as this will allow it to settle and will reduce any crumbs coming loose as you add your filling.

FAQs
Yes! Golden Oreos make for a great cheesecake (or pie) crust. Golden Oreos are essentially a vanilla cookie biscuit with vanilla cream. This means that a crust made with Golden Oreos will be a vanilla version of the classic chocolate Oreo crust.
This recipe for golden Oreo cheesecake crust can be used for either baked or no bake cheesecake recipes (follow the your cheesecake filling recipe for any baking or chilling instructions).
This vanilla cookie crumb crust will last for a couple of days in the refrigerator prior to use or you could freeze it for up to 3 months.
Once filled, times will vary - some fillings may leave the crust soggy after a couple of days (especially once the dessert is cut). If the dessert filling can be frozen, I would recommend freezing leftover slices to extend shelf life in these instances.
No! Just like my standard two-ingredient Oreo crust recipe, this golden Oreo version does not need to have the sandwich cookie filling removed before blitzing the Oreos into a crumb. In fact the vanilla cream filling is integral to the recipe, providing sweetness without needing to add sugar and helping to bind the crust together.
Need some more crust ideas? Try one of these recipes with your next pie or cheesecake:
Or maybe some ideas for fillings? You can use Golden Oreo crust in these recipes:

Golden Oreo Crust
Equipment
- large mixing bowl
- spatula
- 8" or 9" springform cake pan or pie dish
Ingredients
- 28 Golden Oreos crushed or ground to fine crumb
- 5 tablespoon unsalted butter melted
Instructions
- Place the finely ground golden Oreos in a large mixing bowl and pour the melted butter in. Stir with a spatula until well mixed into a lightly moist crumb.28 Golden Oreos, 5 tablespoon unsalted butter
- Pour the mixture into your prepared dish (either a lined springform pan, pie plate or tart shell) and press firmly into the base and up the sides (see note).
- Once firmly pressed, this Golden Oreo crust can be used for baked or no bake cheesecakes or pies as directed in your filling recipe. I recommend chilling the crust while you prepare the filling. After filled (and baked if necessary), it is best to chill for at least 2 hours (or longer if needed for the filling) before serving, to ensure that the crust is set well for slicing.


Victoria
Can you pre-bake the crust before filling it?
Liz Mincin
Hi Victoria - it is possible to pre-bake this crust to toast it up a bit. It's not typically necessary though as the crust itself doesn't require bake time itself.